The DIY Kitchen Project That Starts Small but Ends Beautifully
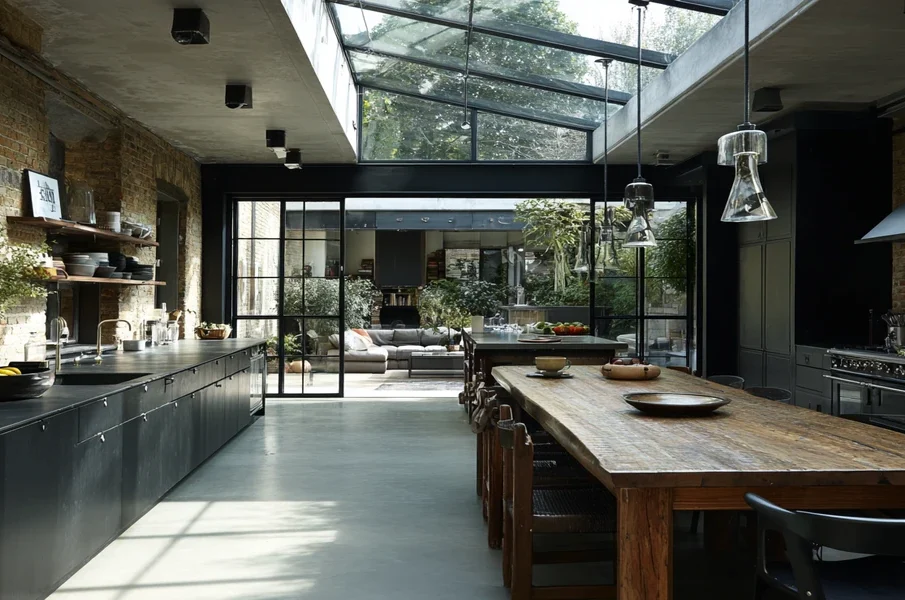
A kitchen makeover does not always require a full renovation or a huge budget. Sometimes, the biggest transformation begins with one simple project: updating your cabinets. If you have ever looked at your kitchen and wished it felt fresher, brighter, or more modern, a do it yourself kitchen cabinet project might be the perfect place to start.
Many homeowners believe cabinet upgrades are only for professionals. The truth is that with the right tools, careful planning, and a little patience, you can give your kitchen a completely new look. Whether you paint old cabinets, replace hardware, or install brand-new cabinet doors, every small improvement adds up.
This guide will walk you through everything you need to know about tackling a DIY cabinet project. By the end, you will see how a simple weekend idea can turn into a kitchen you truly love.
Why Start with Kitchen Cabinets?
Cabinets take up a large part of your kitchen. Because they cover so much wall space, even small changes can have a huge impact.
Instead of replacing your entire kitchen, updating your cabinets lets you:
- Save thousands of dollars.
- Improve your home’s appearance.
- Increase resale value.
- Learn useful DIY skills.
- Customize your kitchen to fit your style.
A do it yourself kitchen cabinet project is one of the highest-impact upgrades you can complete without hiring a contractor.
Decide What Your Cabinets Need
Before buying paint or tools, look closely at your existing cabinets.
Ask yourself:
- Are they structurally strong?
- Do the doors close properly?
- Are they made from solid wood?
- Is the finish simply outdated?
If the cabinet boxes are still in good condition, you probably do not need a full replacement. Many kitchens only need cosmetic updates.
Common DIY improvements include:
- Painting cabinets
- Refinishing wood
- Replacing cabinet doors
- Installing new handles
- Adding soft-close hinges
- Installing under-cabinet lighting
Starting with one improvement often inspires homeowners to continue updating the rest of the kitchen.
Plan Before You Begin
Good planning saves time, money, and frustration.
Create a simple checklist before starting your project.
Measure Everything
Record:
- Cabinet height
- Cabinet width
- Door dimensions
- Drawer sizes
Double-check every measurement before ordering materials.
Set Your Budget
A basic do it yourself kitchen cabinet makeover may cost only a few hundred dollars, while replacing doors and hardware could cost more.
Typical budget items include:
- Paint
- Primer
- Sandpaper
- Brushes
- Rollers
- Screwdrivers
- New hinges
- Cabinet pulls
- Protective drop cloths
Planning your expenses helps prevent surprises.
Choose the Right Style
Think about the overall look you want.
Popular cabinet styles include:
Modern
- Flat-panel doors
- Matte finishes
- Black hardware
- Clean lines
Farmhouse
- White paint
- Natural wood shelves
- Bronze handles
- Shaker doors
Traditional
- Rich wood stains
- Decorative molding
- Raised panels
- Classic hardware
Scandinavian
- Light wood
- Soft white colors
- Minimal decoration
- Simple handles
Choose a style that matches the rest of your home rather than following every trend.
Gather the Right Tools
You do not need a professional workshop.
Basic tools include:
- Power drill
- Screwdriver set
- Painter’s tape
- Orbital sander
- Paint brushes
- Foam rollers
- Wood filler
- Putty knife
- Measuring tape
- Level
- Safety glasses
- Dust mask
Having everything ready before starting keeps the project moving smoothly.
Remove Cabinet Doors Carefully
One of the biggest mistakes beginners make is removing everything without labeling it.
Instead:
- Remove one door at a time.
- Number each door.
- Label each hinge.
- Store screws in small bags.
- Take photos before removing hardware.
These simple steps make reassembly much easier later.
Clean Before Painting
Kitchen cabinets collect years of grease, cooking oils, and dust.
Even cabinets that appear clean often have hidden residue.
Use a degreasing cleaner and wipe every surface thoroughly.
Skipping this step can cause paint to peel or bubble.
Clean surfaces create stronger paint adhesion.
Sand the Surface
Sanding helps paint stick better.
You do not need to remove every bit of the old finish.
Light sanding is usually enough.
Focus on:
- Door fronts
- Drawer faces
- Cabinet frames
- Edges
- Corners
After sanding, wipe away all dust using a tack cloth or damp microfiber towel.
Prime for Better Results
Primer creates a smooth base for paint.
Benefits include:
- Better paint adhesion
- More even color
- Fewer coats needed
- Longer-lasting finish
Choose a primer designed specifically for cabinets or glossy surfaces.
This step may seem slow, but it makes a major difference.
Paint Like a Professional
Take your time.
Use thin, even coats instead of thick ones.
Allow each coat to dry fully before adding another.
Most cabinet projects require:
- One primer coat
- Two paint coats
A small foam roller leaves a smoother finish than many standard brushes.
For corners and details, use a high-quality angled brush.
Upgrade the Hardware
Replacing old handles instantly modernizes cabinets.
Popular finishes include:
- Matte black
- Brushed nickel
- Satin brass
- Oil-rubbed bronze
If your old handles use different hole spacing, you may need to fill old holes before drilling new ones.
Fortunately, this is a simple DIY repair using wood filler.
Replace Hinges if Needed
Old hinges often squeak or allow doors to sag.
Soft-close hinges are a popular upgrade because they:
- Prevent slamming
- Protect cabinet doors
- Reduce wear
- Feel more luxurious
Many homeowners say this small improvement makes the kitchen feel completely new.
Consider Open Shelving
Not every cabinet must stay closed.
Removing one or two upper cabinet doors creates open shelves.
Open shelving works well for displaying:
- Plates
- Glasses
- Cookbooks
- Plants
- Decorative bowls
Just remember to keep shelves organized since everything remains visible.
Add Interior Storage Solutions
A beautiful cabinet is even better when it works efficiently.
Simple storage upgrades include:
- Pull-out shelves
- Spice organizers
- Lazy Susans
- Drawer dividers
- Trash pull-outs
- Vertical tray storage
Improving organization often makes the kitchen feel larger without adding extra space.
Install Under-Cabinet Lighting
Lighting is one of the easiest ways to improve your kitchen.
LED strip lights are:
- Affordable
- Energy efficient
- Easy to install
- Bright enough for cooking
They also highlight your newly finished do it yourself kitchen cabinet project beautifully.
Common DIY Mistakes to Avoid
Many cabinet projects fail because of simple mistakes.
Avoid these common problems.
Skipping Cleaning
Paint sticks poorly to grease.
Always clean first.
Rushing Dry Time
Allow enough drying time between coats.
Patience creates a stronger finish.
Buying Cheap Paint
Cabinet paint experiences daily wear.
High-quality paint usually lasts much longer.
Forgetting Labels
Always label doors and hardware before removing them.
This saves hours during installation.
Ignoring Ventilation
Paint fumes can become overwhelming.
Open windows and use fans whenever possible.
How Long Does the Project Take?
Every kitchen is different.
A small kitchen may take:
- Day 1: Remove doors and clean.
- Day 2: Sand and prime.
- Day 3: First paint coat.
- Day 4: Second coat.
- Day 5: Reassemble cabinets.
Larger kitchens naturally require more time.
Do not rush simply to finish faster.
Is DIY Always Better Than Replacement?
Not always.
A do it yourself kitchen cabinet makeover works best when cabinet boxes remain strong.
Replacement may be necessary if cabinets have:
- Water damage
- Mold
- Warped wood
- Broken frames
- Poor layout
- Structural issues
In these situations, installing entirely new cabinets may provide better long-term value.
Budget-Friendly Ways to Upgrade Cabinets
If your budget is limited, you can still achieve noticeable improvements.
Affordable upgrades include:
- New knobs
- Fresh paint
- Peel-and-stick shelf liners
- Soft-close bumpers
- Interior organizers
- Decorative molding
Many homeowners spread improvements over several months instead of doing everything at once.
Keeping Your Cabinets Looking New
After finishing your project, proper maintenance protects your hard work.
Follow these simple habits:
- Wipe spills immediately.
- Avoid harsh chemical cleaners.
- Tighten loose handles yearly.
- Clean grease regularly.
- Touch up scratches quickly.
- Keep cabinet hinges adjusted.
Regular care keeps cabinets beautiful for years.
Why DIY Feels So Rewarding
There is something special about completing a project with your own hands.
Every time you walk into the kitchen, you remember the effort that transformed the space.
Unlike buying ready-made cabinets, a DIY project tells a story. It reflects your creativity, patience, and personal style. Small imperfections often become reminders that your kitchen is truly one of a kind.
Even better, the confidence you gain often inspires future home improvement projects.
Final Thoughts
A stunning kitchen makeover does not have to begin with demolition or an expensive contractor. Sometimes, all it takes is the decision to improve one cabinet, replace one handle, or apply one fresh coat of paint. That first step often leads to a complete transformation.
A do it yourself kitchen cabinet project proves that beautiful results come from careful planning, steady effort, and attention to detail-not necessarily a large budget. From cleaning and sanding to painting, upgrading hardware, and improving storage, each small task builds toward a kitchen that feels brighter, more functional, and uniquely yours.
If you’ve been waiting for the perfect time to refresh your kitchen, there’s no need to wait for a major renovation. Start with your cabinets, work at your own pace, and enjoy watching your space evolve. The project may begin small, but the finished result can completely change how you feel about the heart of your home.