How To Build Your Own Wildlife Pond
Introduction
A pond is an extremely vital habitat for any ecosystem. In an urban setting, it can add a lot more charm to your backyard. However, building a pond requires a lot of digging and excavation. You can search for “topsoil near me” and buy some for building a pond. Let’s figure out how you can build your own pond.
The Details
- Choose the site – After you decide on the size of your pond, you need to figure out where you want to build it. It’s best to start with corners since they can be blocked off in case something goes wrong. You need to make safety a priority while building anything. If the pond is near a shed or a fence, those structures would help the pond from extreme temperatures during the sizzling summer and harsh winter seasons.
Those structures would provide the right amount of shade to prevent extreme temperature irregularities and would also allow plenty of sunlight for aquatic plants to thrive. On the other hand, if you decide to build your pond near a building, you can take advantage of the height and stability of that structure to divert rainwater into the pond. If there’s heavy rain, the pond will overflow and flush through.
While you’re choosing the site, make sure that you’re not too close to bushes and shrubs. Trees and bushes would shed a lot of dead leaves and fill up your pond. The situation would be unmanageable if they are not evergreen trees. However, that’s not all. Even if you somehow manage to keep the pool clean from the few leaves shed by evergreen trees, you wouldn’t be able to do anything about the roots of the tree invading the pond lining.
- Dig a hole – This is the most difficult and labor-intensive part of building a pond. When you’re digging a hole for the pond, try to limit its depth to the length of your arm. That way, you’ll always be able to easily retrieve items that fall into the pond. If you’re looking for pre-formed ponds, DIY stores sell plastic variants and come with all the necessary prep and installation instructions. For those structures, you usually need to dig a hole according to the dimensions, level it flat, and line the bed with wetted sand for structural support.
On the other hand, you may prefer a flexible liner that allows you to dig and level according to your unique needs and not stick to certain factory dimensions. You also get to shape the pond any way you want. If you’re going that route, you can also dig at varying levels with a ledge that goes as deep as 20 cm. Keep the ledge close to a narrow corner so that the aquatic plant pots you place inside them are easy to pull out by straddling them along the corner.
If your region gets harsh and freezing cold winter seasons you should limit the ledge to less than 10cm. That way, the pool would have an unfrozen section under the surface in the winter. While you dig the pool hole, stick to the basic round shape. Complexities and curves can be added. However, you should not go all out since it will make lining the edges equally difficult and tricky. You should also save up the topsoil you dig out. Otherwise, you can buy fresh topsoil late on for enriching other parts of the garden or for shaping the edges of the pool.
- Line the pool – Get a heavy-duty sheet of liner that stretches twice the length and width of the pool. That way the liner would fit and cover the shape and depth of the pool without any issues. Before lining the pool, remove all roots, weeds, sharp stones, and other items from the edge and base of the pool. After that cover the bare ground with wet sand, newspaper, or old carpet to prevent punctures.
Next, use the dug-out or bought topsoil to build rides and mounds for the pool and add visual interest. You can also create stairways and slopes at the edge so that the local wildlife that would be attracted to the pond can easily get out even if they accidentally fall down. Finally lay down the liner sheet in a double layer with a generous gap on the perimeter. Start adding water slowly and let the liner organically sink into shape.
- Fill the pond – Once the liner is set, you can use a water butt or allow rainfall to naturally do its work. Don’t use tap water since it contains chlorine and other chemicals that are harmful to wildlife. It also lacks a lot of nutrients. After that, you’re ready to add plants. When the pond is full, trim the edges of the liner and weigh it down with natural rocks and stones to hide the liner completely. You can also add grass and plants, later on, to make the edge look as natural as possible.
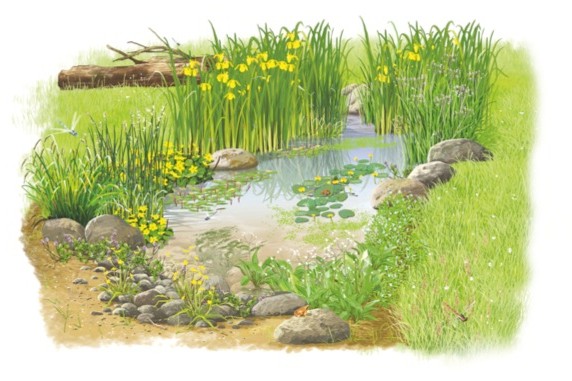
While choosing plants for the pond, make sure that you use oxygen-rich plants that can keep the water clean and prevent algae from conquering the water. Try to limit the selection of plants to native aquatic species since they are more suited to the local region and hence more sustainable. For the pond surroundings, you can use plants like marigolds and a lady’s mantle to amp up the natural look.
After the pond is filled up and plants start to thrive it’s time to wait and watch. After a few weeks, you’ll be delighted to see water boatmen, frogs, dragonflies, and other wildlife make the pond their home.
Conclusion
Ponds can invite all kinds of wildlife and make the tiny ecosystem in your backyard livelier. They can also add a lot of value to your property if you’re able to build the pond and maintain it the right way. Either way, you’re going to need topsoil to restore the yard after the pond is built. For that, you can search for “topsoil near me” and buy some from the nearest store.